Vegantune

All posts tagged Vegantune

Less Grimey

On to the gearbox, less grime, but other foibles.

Think I’ve mentioned it previously, but it’s not a “normal” Elan gearbox, instead the car is running a ZF 5sp unit.

The S5-18/3 to give it its geek name, is from a family of ZF boxes that found their way in to everything from Bedford vans to droopsnoot Firenzas. Thankfully, our version being the latter, it was also a popular upgrade found in race and rally Escorts in period as it was a strong 5sp box with relatively close ratios.

Having separated the bell housing, I had the remaining gearbox to remove the grime from and the peeling paint work.

Careful & gentle use of some degreaser, I’m not convinced she’s water & solvent tight.

Unfortunately, I’ve found some issues along the way so, just ordered a workshop manual…

Not as much achieved today as I would have liked with covid hitting me again.

Separated the bell housing from the gearbox a good while back and gave it yet another de-greaser bath today and finally got it to the stage you can touch it without having oily fingers afterwards. Time to set about removing the knackered clutch slave cylinder.

With the car being converted to run a 5sp ZF transmission it goes without saying, it’s not standard Lotus. However, it’s not entirely left field, you can still buy them from Burton Power, in exchange for £500+. I would rather not shell out that kind of money, so care will be needed on this operation.

It was obvious the slave cylinder was gubbed as soon as we moved the car out my parents’ garage back in 2018, the clutch pedal was non-existent.

Using a small flathead screwdriver I removed the retaining circlip several months ago. Then using a fine pick, I cleared the bits of corrosion out of the ring groove and applied all manner of release agents periodically for a few weeks. This was all to no avail, it was still solid and even using big grips, it wouldn’t budge.

Before getting stuck in, I gave it one more dose of 3-in-1 then used a spanner and spring punch to give it some light impacts, hoping to help the penetrant get in to the corrosion.

Amazon Prime Time: 2 leg Sealey puller delivered yesterday. The 3 leg pullers I already had just didn’t seat properly on the flange and really didn’t want to risk point loading the casting.

Big penny washer to give the puller something to push on, cranked a few turns on it, feels like it’s moving. Few more turns, bugger, it’s just bending the washer.

Paused for inspiration and decided to give it a mild heating with the small blowtorch (then gave it some tender percussive persuasion with the spanner…)

Immediately started pushing out as soon as I put another turn on the puller! Plenty more turns and it was pushing in freely now, so removed the puller and put a big set of grips back on and shoved it back up to where it started.

Used the centre aisle rotary to clean up the corrosion around the open end of the slave cylinder just in case it tried to pick up when passing through the casting. Popped out clean and easy after that.

Pretty sure the slave cylinder is a lost cause but decided to strip it down and have a look to see if it’s worth rebuilding.

First up, 50/50 degreaser/water mix in a jar, popped it in then gave it ten minutes in the ultrasonic cleaner.

Came out surprisingly well and with a mild heating, the bleed nipple cracked off fairly easily.

That’s where the good part ends. Despite cleaning up the bore with a softish rotary brush you can feel the corrosion on the cylinder wall with your finger nail. One of the many engineering rules of thumb I’ve happened across is if you can feel it with your nail, oil will leak out of it.

Also tried using compressed air down the clutch line port and the cylinder is not up for budging at all.

Time hopping again, early Sept 2021, stripping down the chassis further…

All the brake lines had utterly seized unions and the pipes were getting replaced anyways, so they just got the snip.

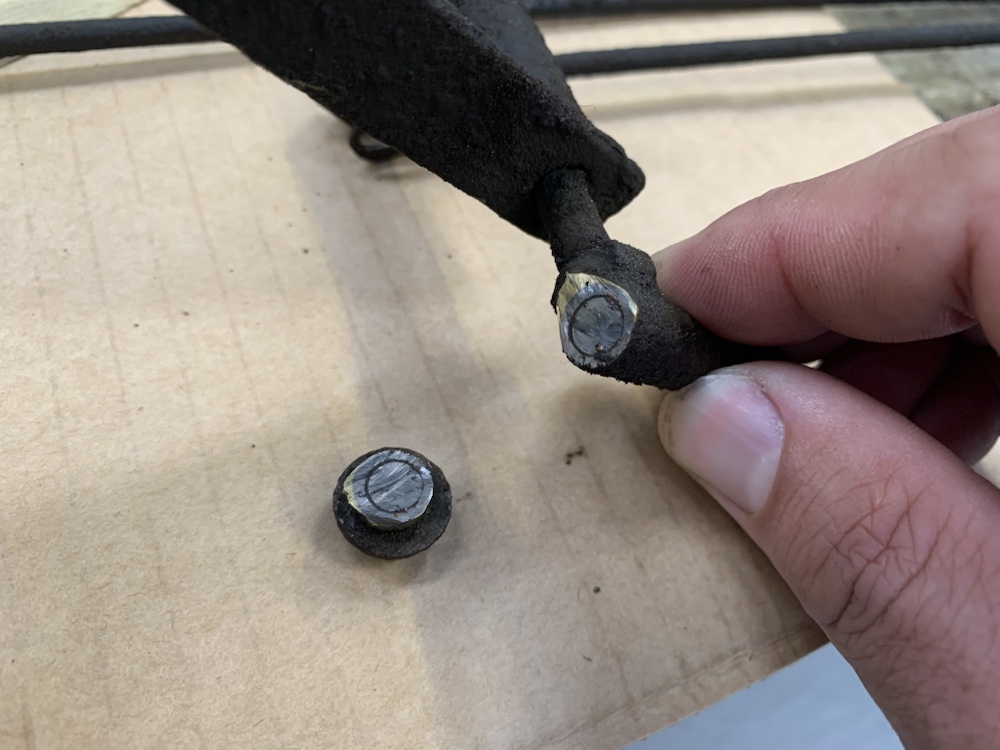
Annoyingly, the handbrake cable’s threaded adjuster was snapped and also seized.

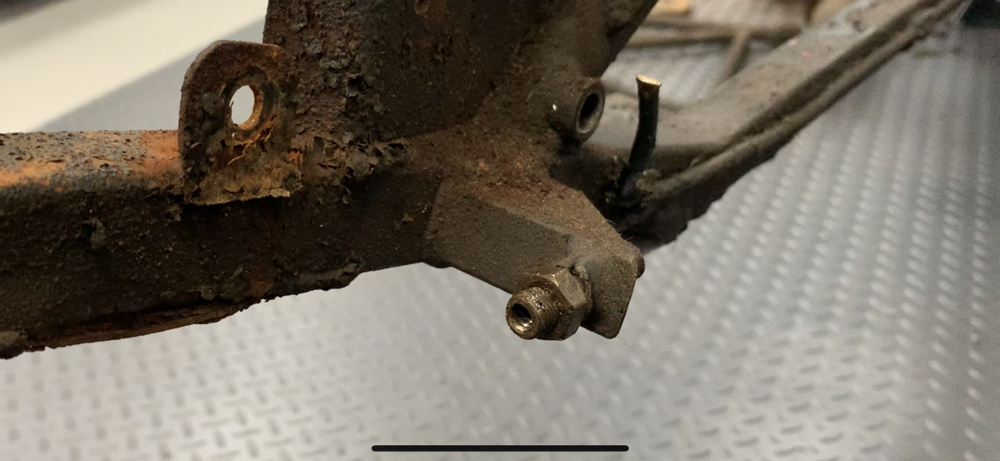
The initial theory was; snip the cable, double nut the section of adjuster tube, wind it out. Snipping the cable went fine, just the part afterwards that didn’t. Not enough thread to get a second nut on properly, thread puller exploded the lock nut, then flat out further refused to shift the threaded sleeve still trapped inside the thread on the chassis.

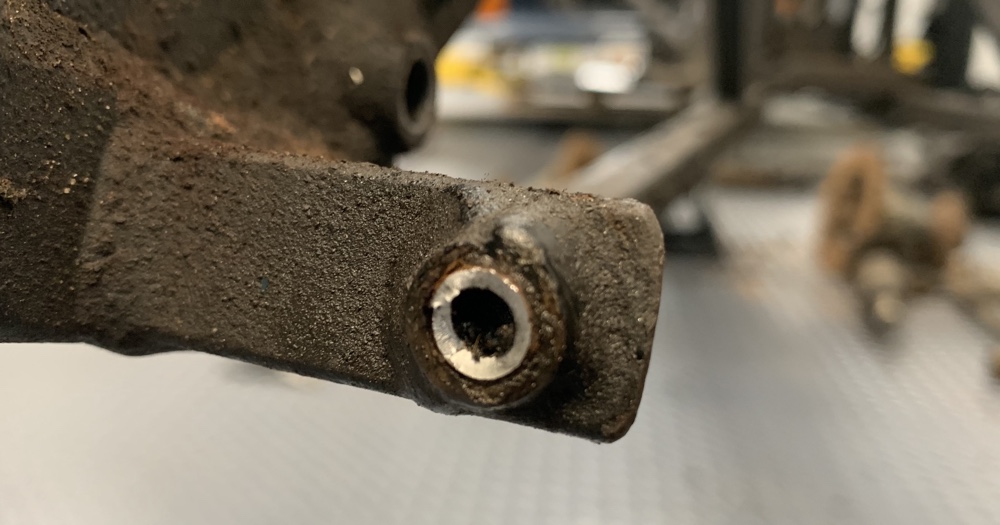
Copious amounts of release oil and applications of heat didn’t change its mind. Wound up accepting defeat and getting a new thread welded in with the rest of the frame repairs.

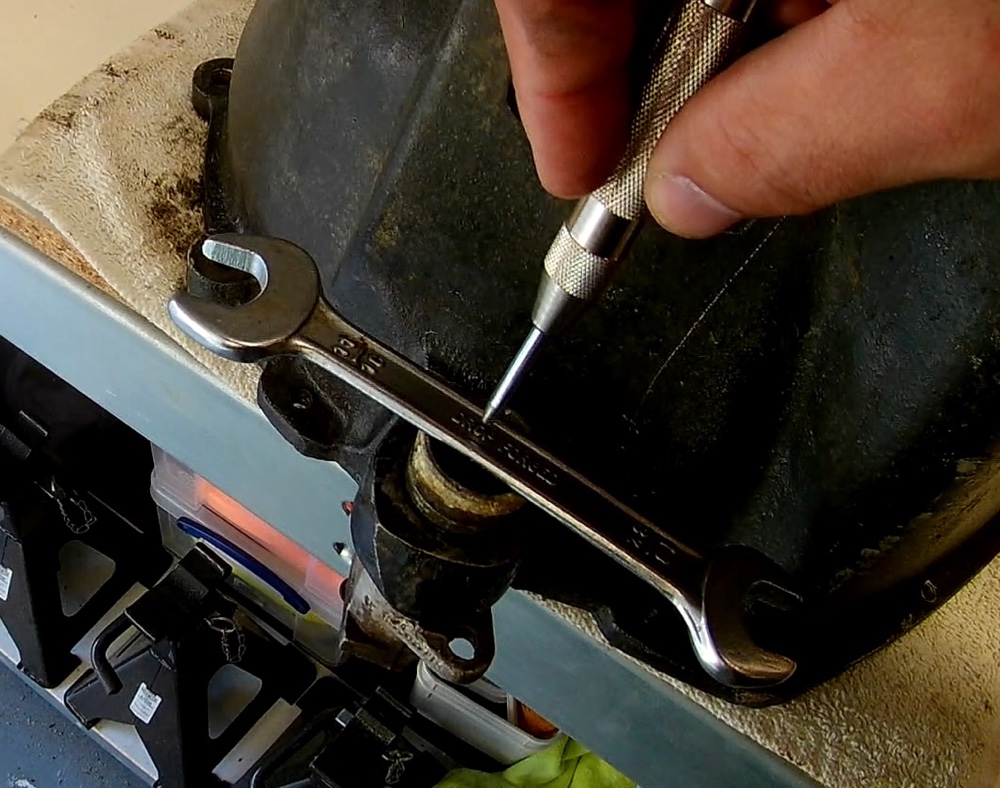
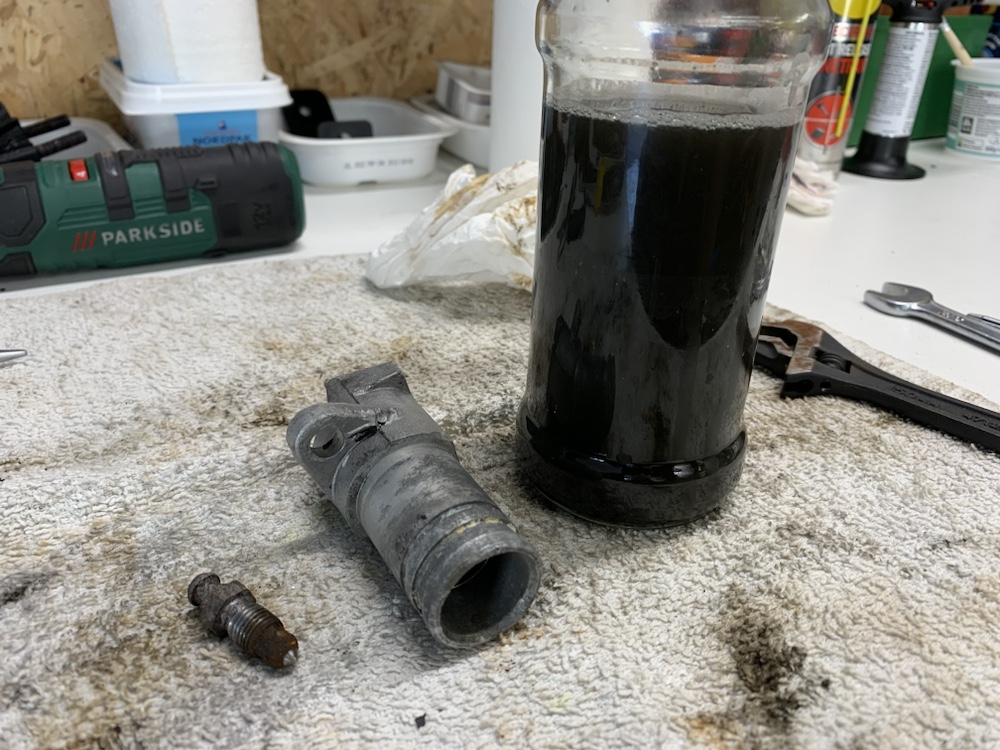
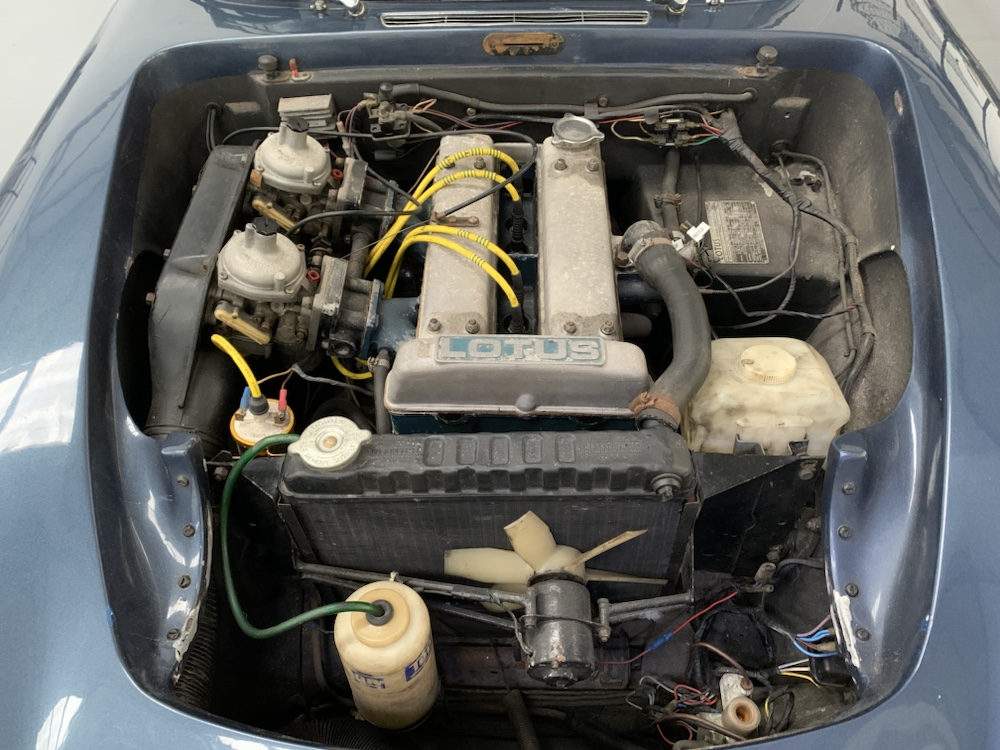
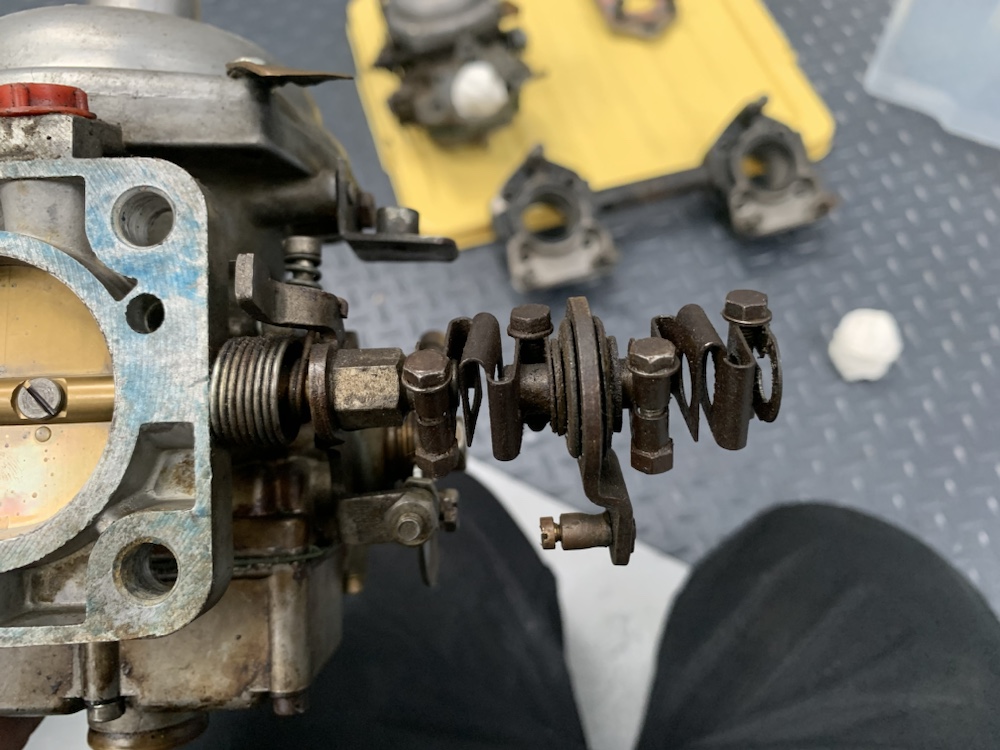
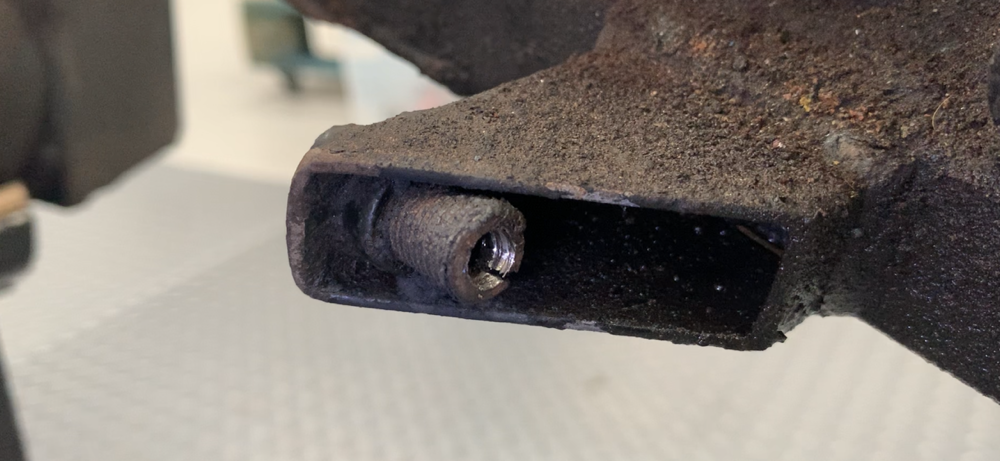
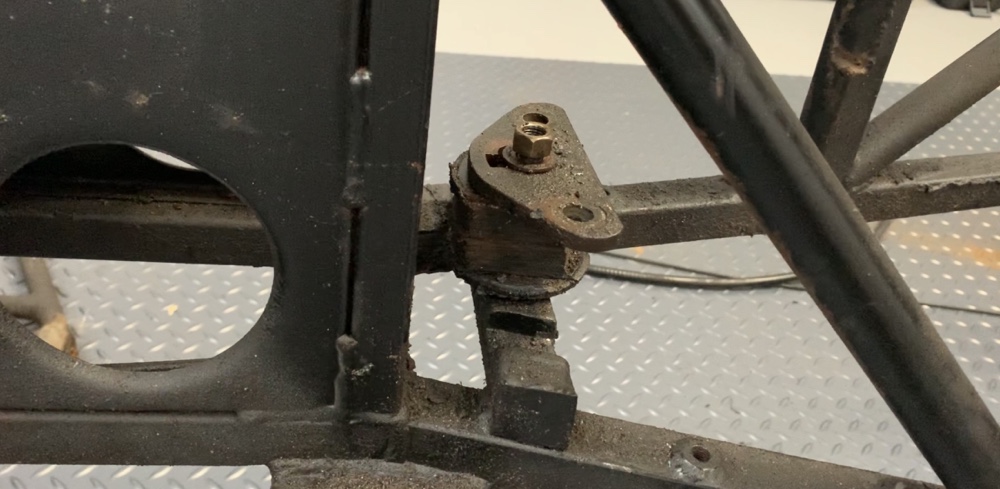
The handbrake tree was the next to ruin my happiness. You can see it fully assembled in this picture [circled blue].

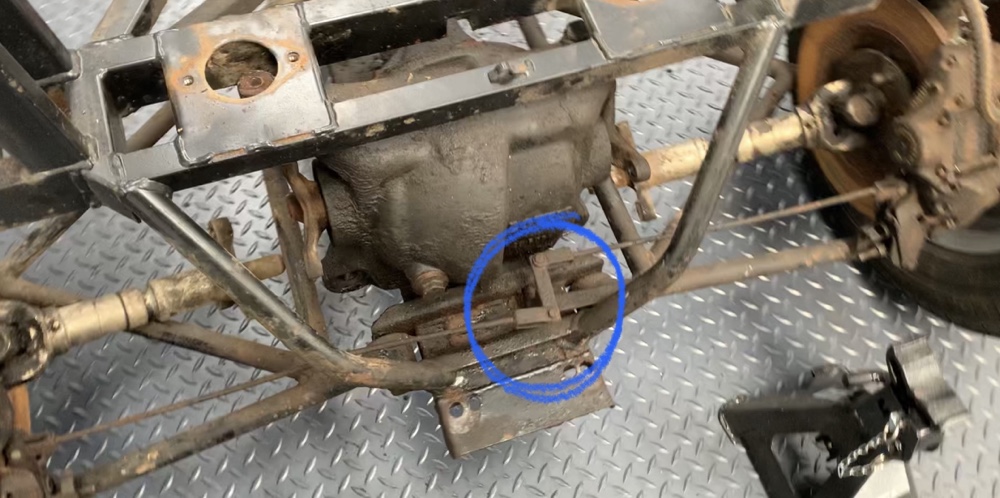
According to the build book, one simply undoes the nut, slides out the through bolt, jobs a good-un.

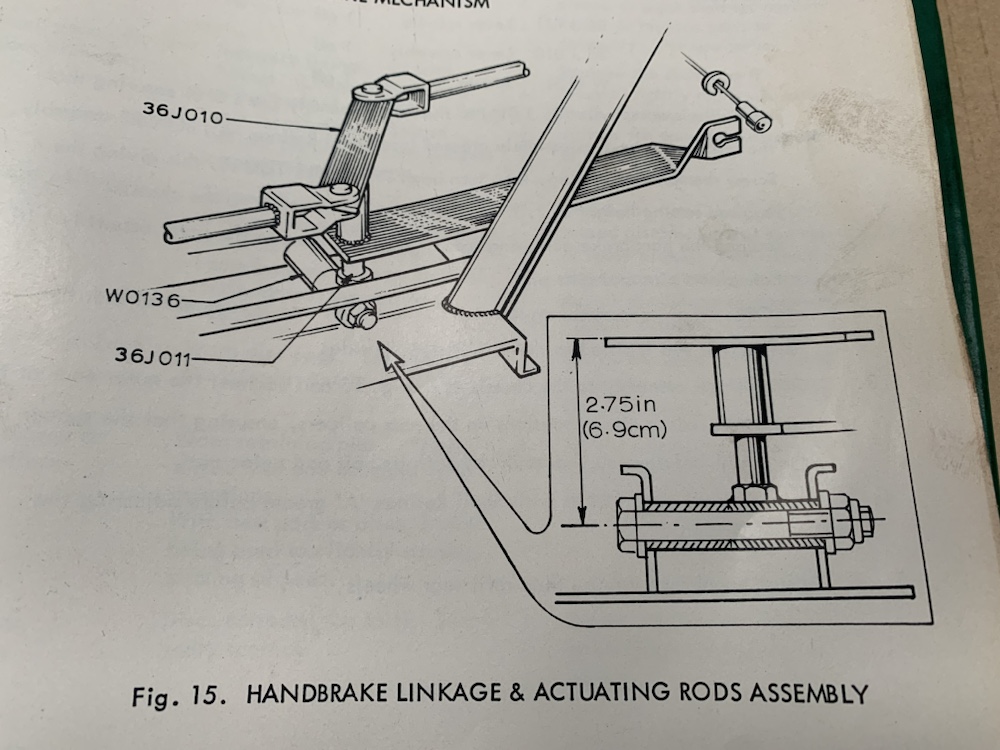
Once again, the Elan said no. The nut came off fine, but despite release oil, heat, impact gun threading the nut back on a few threads and twatting it with 2kg hammer… all in vain.

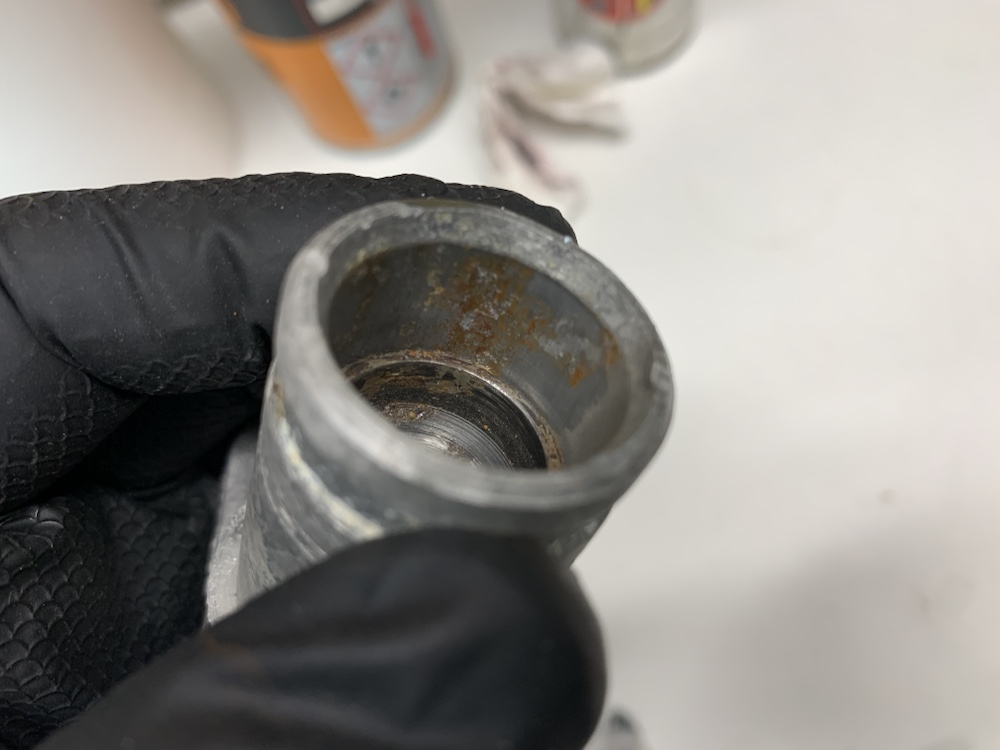
It doesn’t help that the access is severely restricted by the flanges on the mounting plate and their welds.

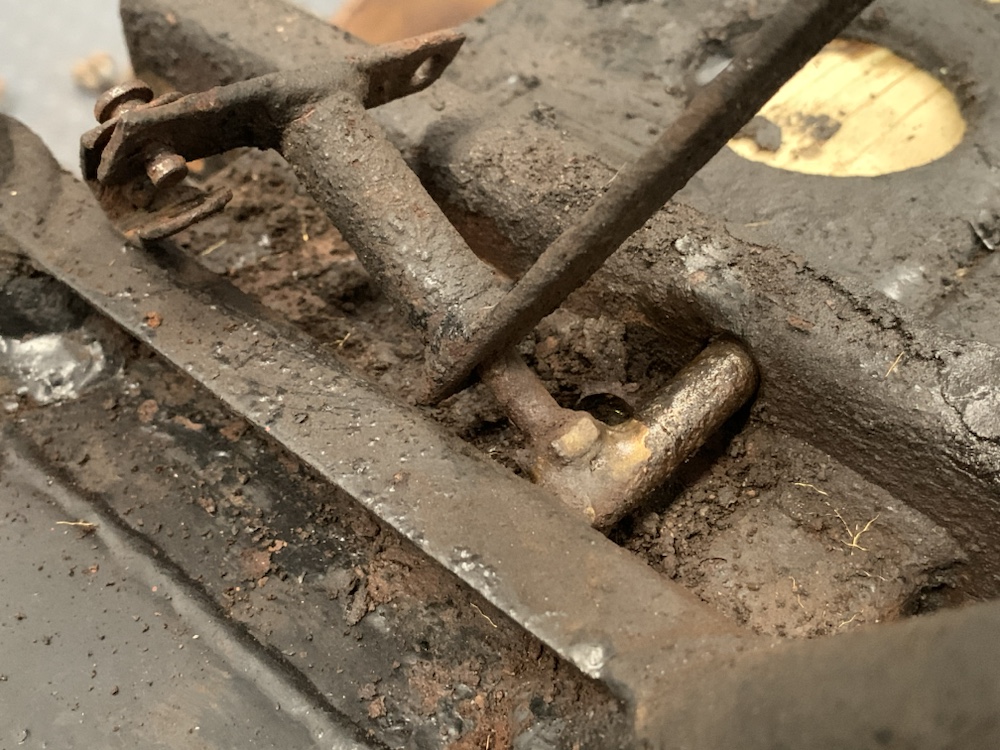
Out with the centre-aisle Dremel copy. Wanted: one replacement handbrake tree…

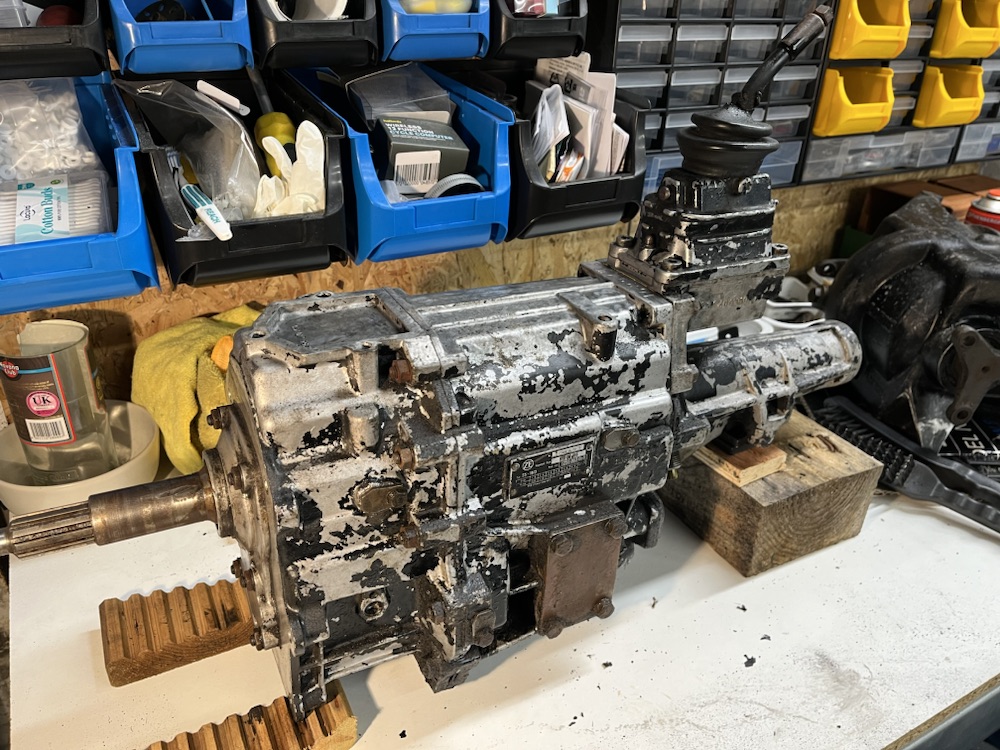
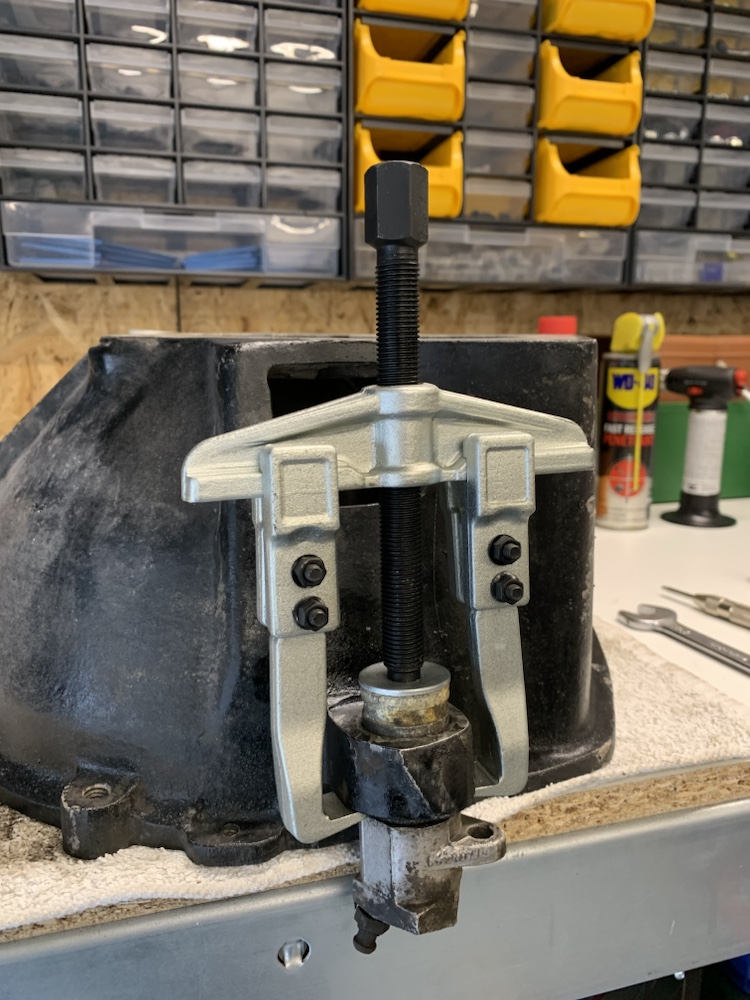
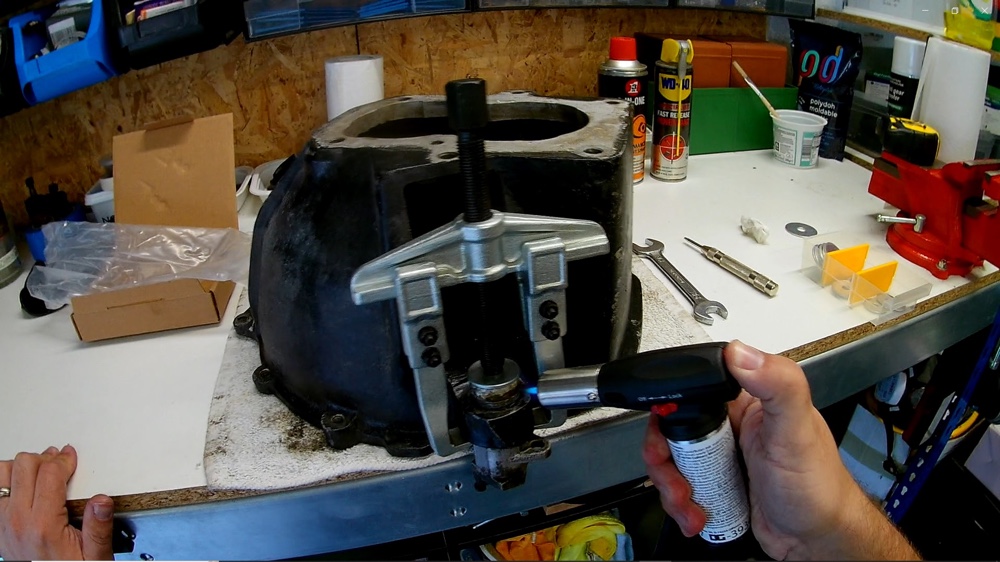
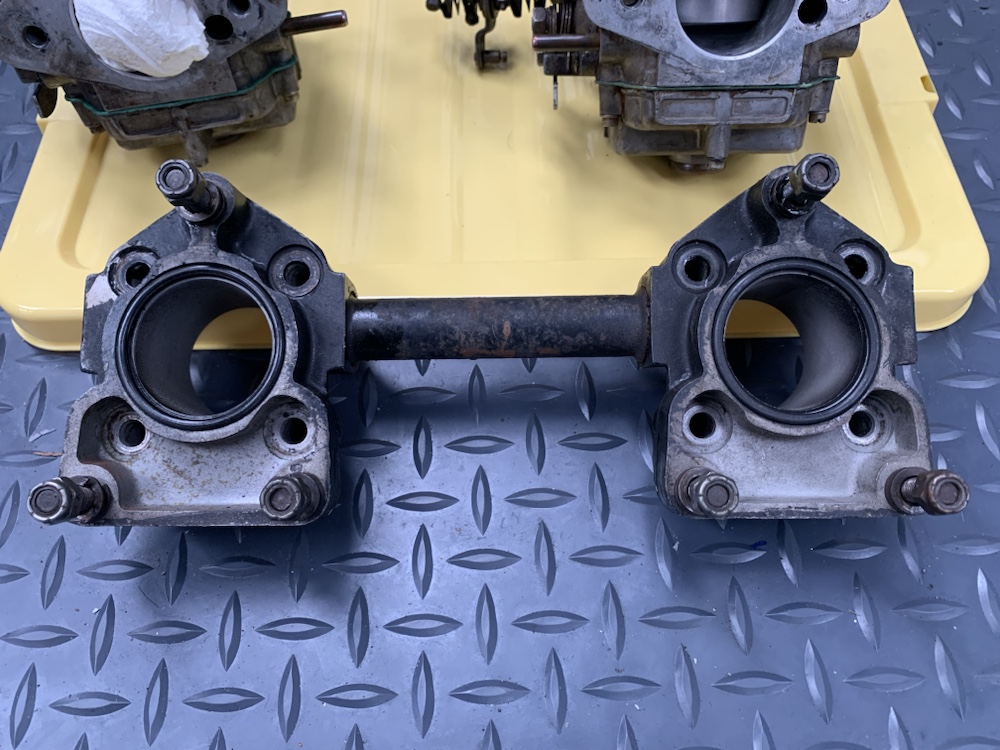
Next up was removing the rear gearbox mount. Would be slightly facetious calling it a scrap heap challenge special, but its definitely got an air of “heres a box of spare bits, make it work” about it. First surprise was metric nut holding on the upper plate, I suspect this is related to whatever vehicle the rubber mounting bush came from [if anyone has suggestions there, I’m all ears].

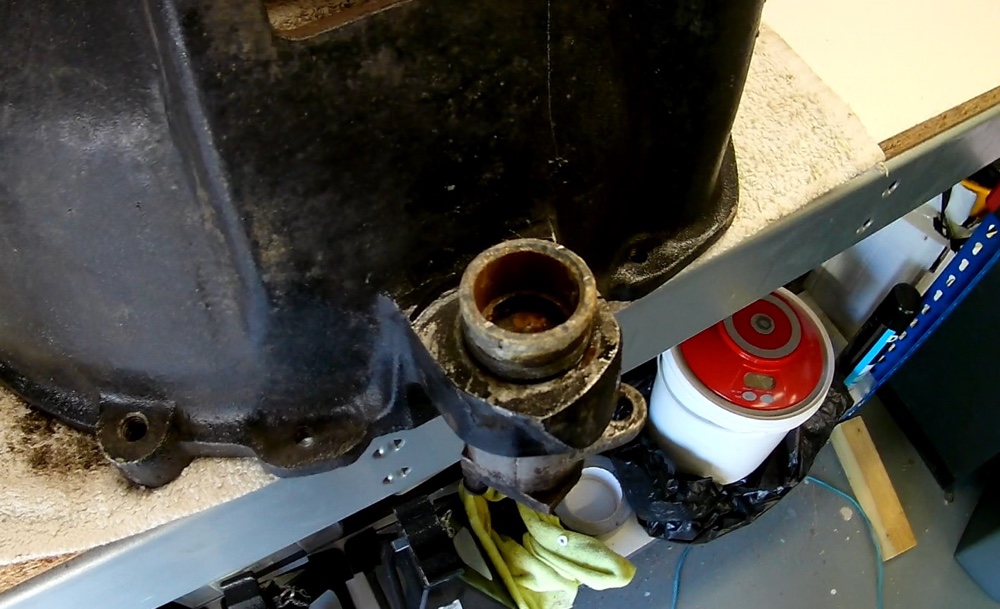
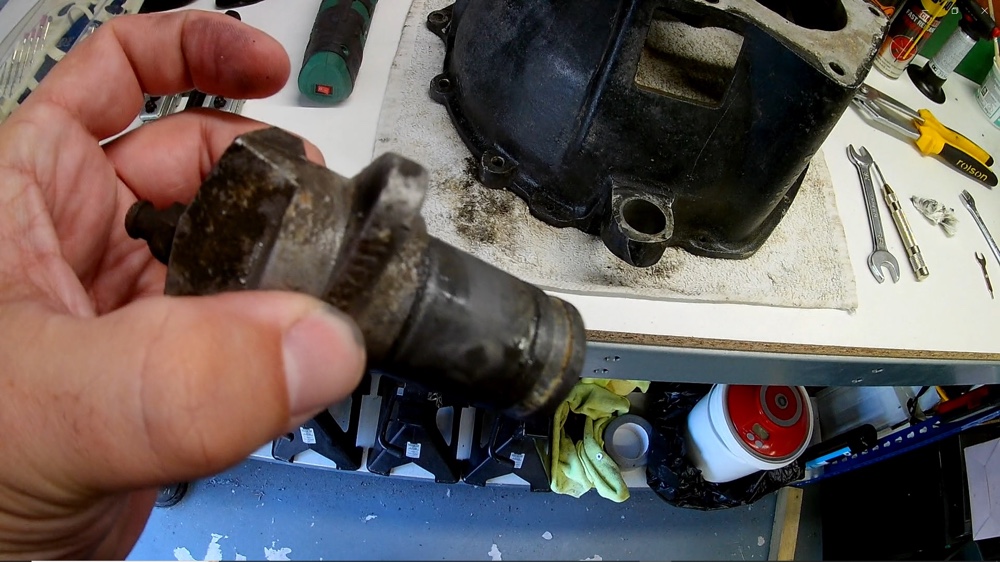
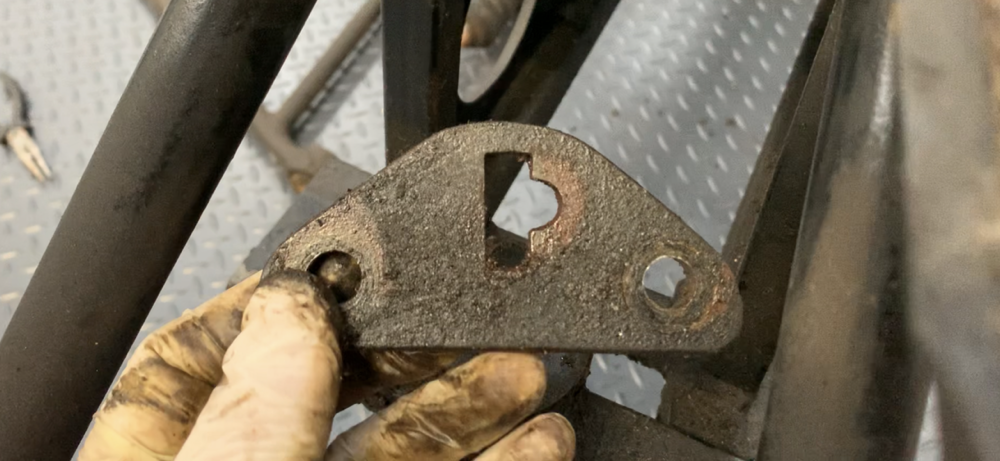
The plate itself was secured to the bottom of the transmission with a couple of bolts, the hole in the centre is a curious one. It’s a slot with a notch cut out, the notch being off centre and the witness marks show that’s where it liked to sit. Its really quite strange, by design, to have something sit deliberately off centre when you could have designed the offset in to the underlying supports.

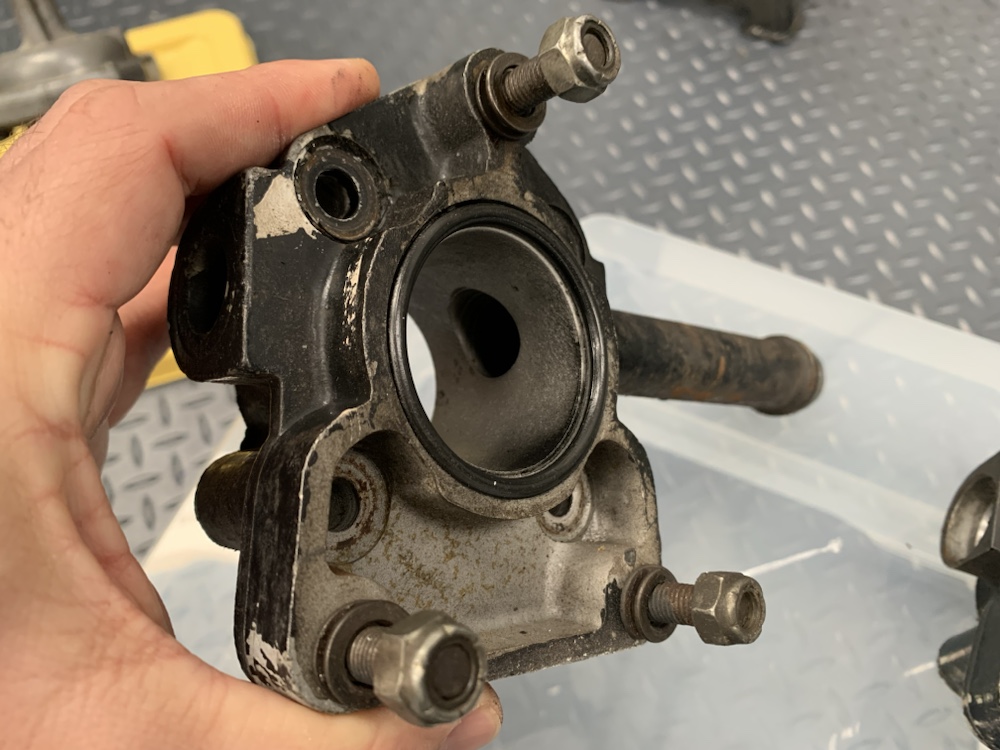
Under the mounting plate was the bushing, a chunky rubber double ender. Its been attacked with a grinder to alter the profile, no idea, doesn’t really relate to any foul condition or giving anything else clearance.

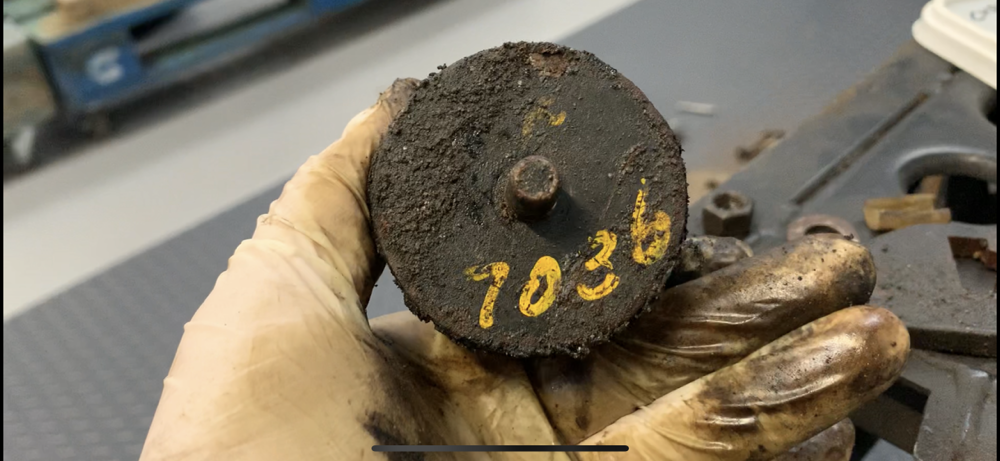
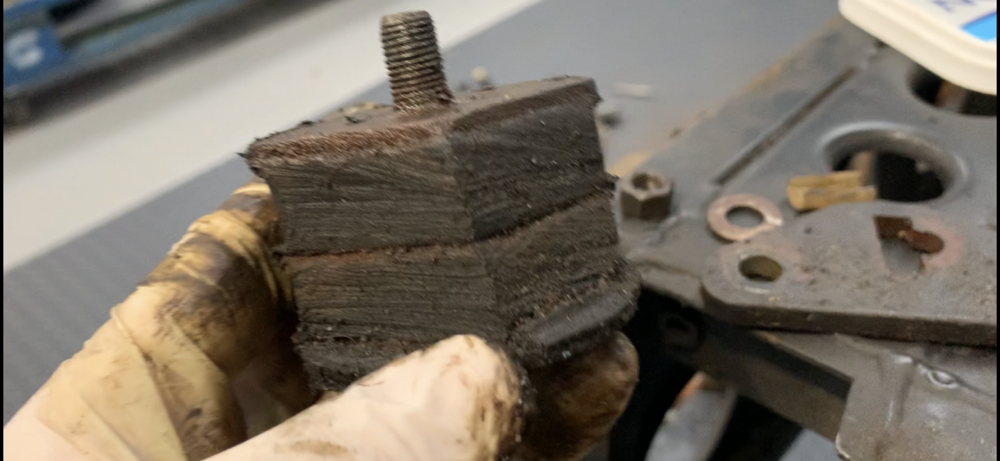
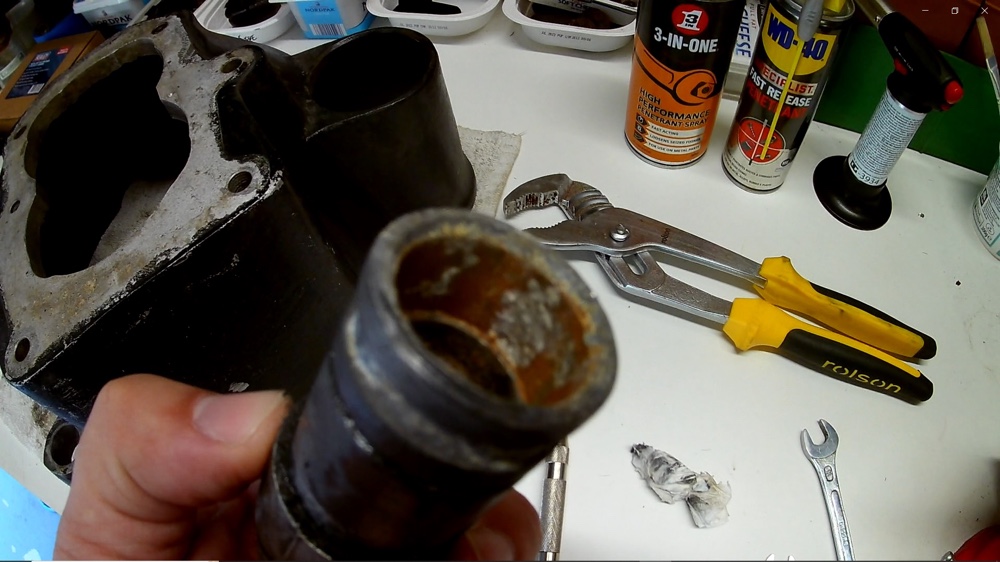
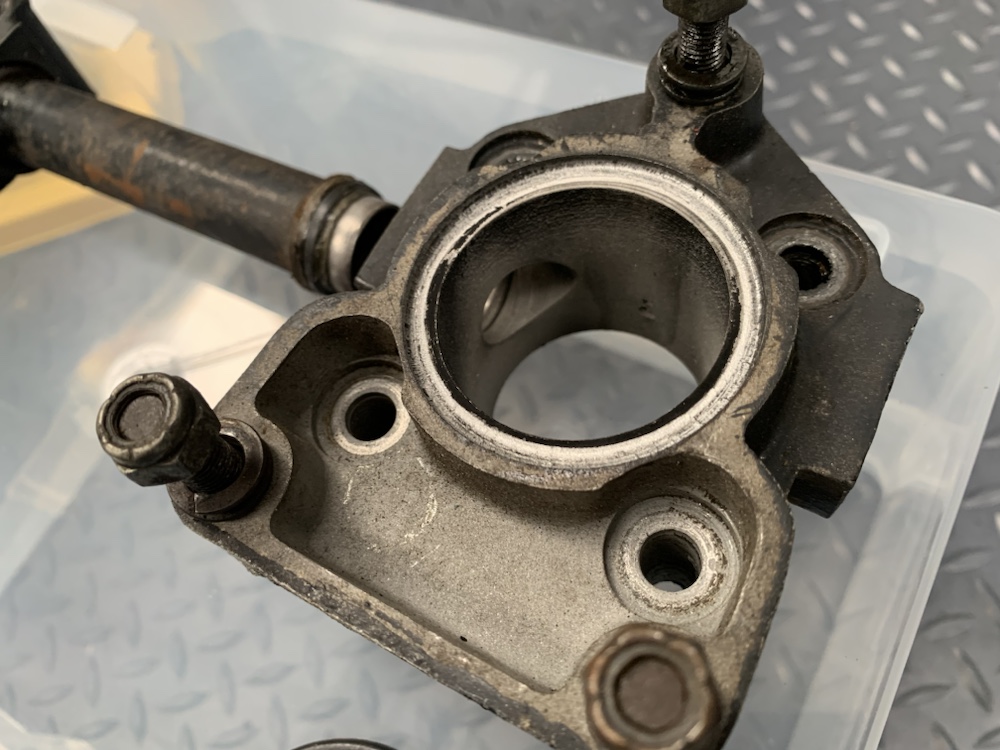
Leaving only the welded on base, which is a piece of bar stock, tapped to accept the bush’s thread. There’s also a slot machined in to the profile, this is to allow the handbrake cable to sit in there and prevent it creating an awkward bend as the cable sheath feeds in to the guide loops welded to the chassis.

This piece isn’t on any images I’ve been able to find online of other Spyder chassis. The hole to the bottom left in the image has a twin on the other side, both are redundant on our car so assume they have something to do with the original Lotus specified / Ford derived transmission.

Stromberg Carbs

Elans of this era came with 2 varieties of carburettor, Weber or Stromberg.

Top level summary; Weber carbs have better outright power potential (and were fitted to Sprint models), Strombergs were better for emissions (and some say are much nicer to drive on the road). That will probably end up being a controversial statement, but it’s a short summary of a big subject.

Our car is fitted with Strombergs which are an interesting choice, but more of that when we come to discussing the engine rebuild.

Nestled in the engine bay before I started pulling things apart, the turrets on top of the carbs hold the damper piston assembly with the casting forming part of the suction chamber. These were the reason for the introduction of the bonnet bulge on the S4 model Elans, there needed to be more clearance.

The carbs were removed quite early in the strip down as they need to come off to create enough clearance to lift the body off the chassis with the engine in situ (not just the carbs actually, the studs in to the head needed removed as well, most guides I found online only mentioned the rearmost 2 studs so I’m assuming that’s for Weber equipped cars with their different head casting for the intake manifold.

Here they are as removed, the two carbs use a single throttle cable, which actuates their throttle butterflies via the very elegant spring mechanism you can see between the two units. Closer up view:

Each carb has a short mounting piece that goes between the carb and the intake manifold runner, the runners are cast as part of the head. There is a balancer tube running between the mounts

The carbs themselves were in pretty decent condition, probably in no small part due to the fuel line feeding them having perished whilst parked up, so that had limited the ability for fuel to sit in them whilst turning to varnish!

However, they’re absolutely critical parts for getting these cars to run right and I know my limitations both in terms of equipment and knowledge. These are not DIY!

So I needed to find someone who could rebuild the carbs for me. Thankfully that was east enough, just reached out to the knowledge base of Caledonia Classics who are based near me in Bathgate, they pointed me in the direction of Alan at ScotCarb.

Went and had a conversation with him and discussed the project and he was able to rebuild the carbs for me whilst making a few adjustments to suit the revisions we were making to the engine during its rebuild.

Don’t want to go over the top with pics, but he sent me loads detailing the rebuild.

The carbs and manifold as delivered:

Stripped down, blasted and or cleaned, various parts re-plated.

Fully rebuilt and ready for me to take home:

Vegantune Work

Been a loooooooong time since I did an update so thought I would do a little bit more about the car’s history before we got it (almost from before I was born in fact!)

My dad sent me over a bunch of pictures of the receipts from the main conversion that was done on the car. Notably there’s no mention of engine works which must have been done at a different time.

Totalling in at £12,366.28 in October 1982, that would be £38,845 in 2022 cash.

Running through the invoices in the same order as the receipt, not every line just the stuff that jumps out at me:


The steering wheel in the car appears bigger in diameter than others I have seen so maybe this is why it has been changed. Extra charge for the SparkRite alarm I took great pleasure in binning! Heated rear screen wiring was present but the rear screen looks period and doesn’t have any heating element fitted.

Rear Koni dampers I couldn’t confirm, it’s fitted with Avo inserts as far as we know now. The driveshaft kit I’ve posted about before and it will be getting a refurb, I quite like it for some reason. 2 headlights is interesting as there’s a clear age and manufacturer discrepancy between the two.

Ammeter is one of the additional dash gauges the car runs in a slightly unusual configuration. Sidelight indicator units are Jag E Type variants. Screenwash kit is a bit rudimentary and will be getting replaced. Hopefully the alternator is ok despite being bathed in a fair bit of oil film and grime in the engine bay.

Full wiring loom was presumably to suit the fitment of the alternator and different gauges in the dash. 6×13 Compomotive wheels is interesting, I was sure they were 7×13, will have to check. Antiroll bar to suit wider wheels possibly suggests the bar has been uprated, will need to research thicknesses etc to find out.

Spyder rollcage added at this point and the chassis repaired. Spyder front arms will be kept as they’re in good condition. The sunroof really isn’t popular with purists, which makes me like it even more tbh.

More body modifications and light units and various replacement body parts, leading to…

This one is the biggie. This ties in to a big incident in the car’s history, given away by the first 3 lines.

As I understand it, the previous owner did a bit of sprints and hill climbs, possibly some fashion of racing and had a shunt with the car, sticking the front left corner in to the scenery. Hence the need for Spyder to straighten the chassis and a replacement bodyshell. The bodyshell which has been modified is not the original, it’s a reproduction, most likely made by Boss based near Snetterton.

It must have been quite a shunt, aside from the engine, gearbox and differential, everything else was either repaired, upgraded or replaced!

Aside from rifling through old receipts, I’ve also managed to score some wheels which we can use to get a rolling chassis again whilst sorting out relacement inner wheel barrels.

Five 5Jx13in Minilite centre lock wheels, with one spare which has been run on the rim but will make a good airline reel or somesuch thing. Couple of them are in need of a refurb so will probably get the whole set done.

Gave them a quick scrub up before stashing away in the garage.