In conclusion

So having done initial investigations;

  • Paint has blisters appearing on the front and rear arches, nasty repair on the front corner, bootlid is a different shade of blue to the rest of the car
  • Door fit is an absolute riot
  • Window seals are completely perished front & rear
  • Drivers elec window needs repaired
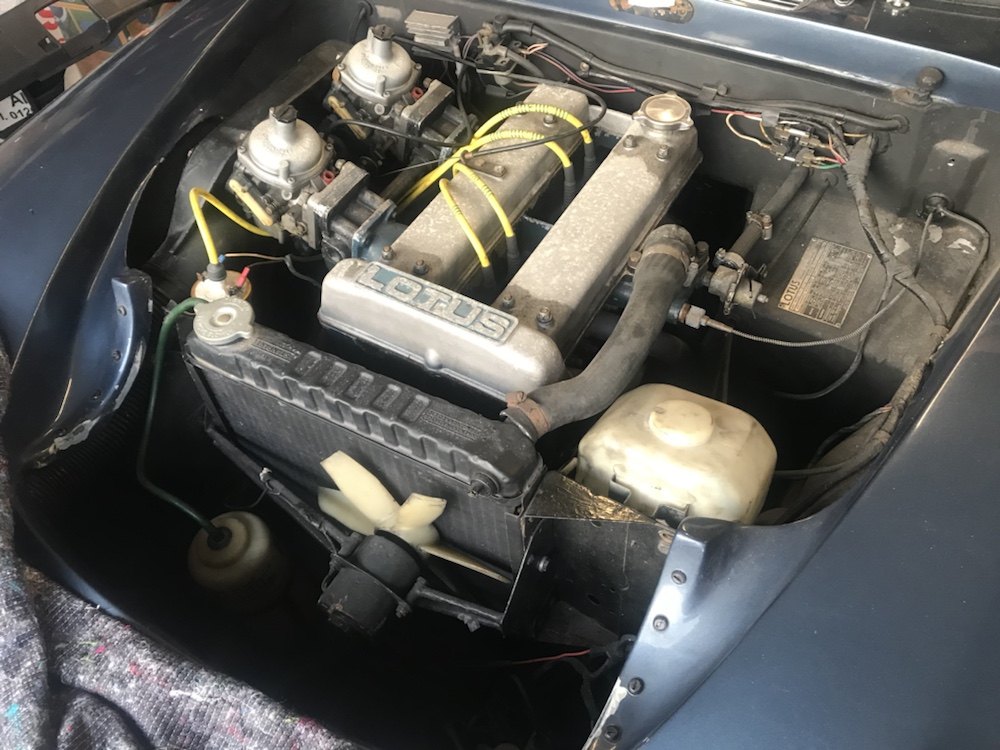
  • Brake master cylinder seals are most likely gone hence zero brake pedal
  • Clutch slave cylinder looks shot
  • Gearbox appears to have a tail seal leak
  • Diff has a leak, looks like nose seal
  • Driveshaft donuts are perished
  • Fibreglass repairs needed in the wheel arches
  • Overheating cause needs investigated, cooling system will need entirely flushed regardless
  • Speedo doesn’t work (hasn’t since 1990)
  • Split rims need rebuilt & resealed
  • Oh, and the keys have gone missing

Bottom line, this isn’t a recommissioning, it’s a rebuild scenario. Time to take it apart!

Reading various manuals and accounts of restoring Elans, it’s useful to get the body and chassis split early on to make everything more accessible.

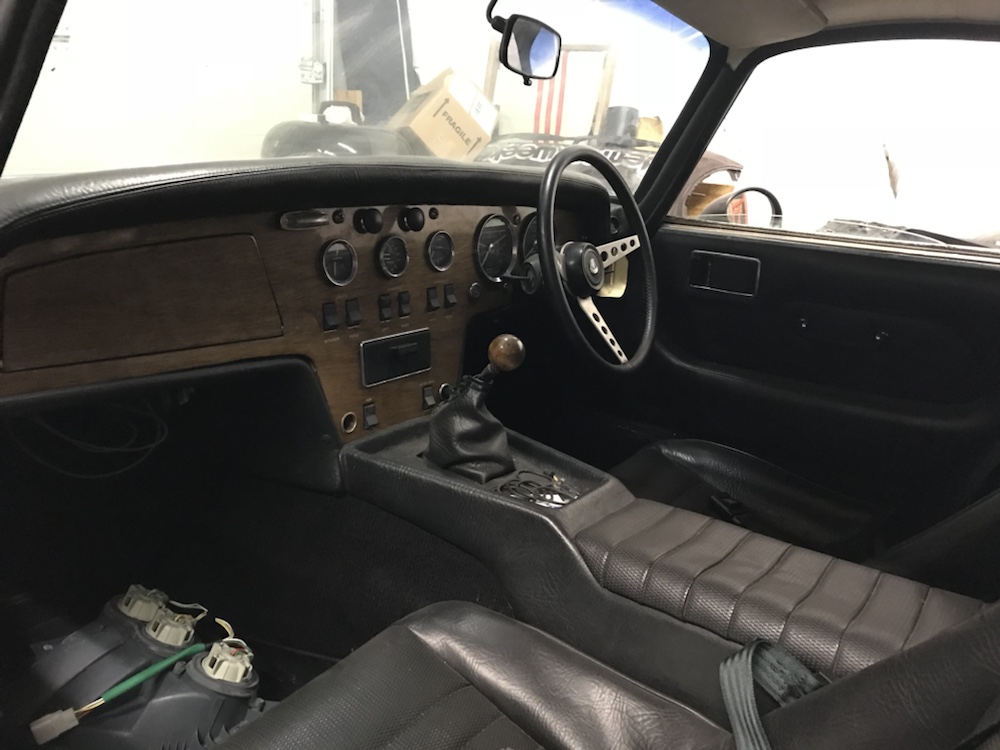
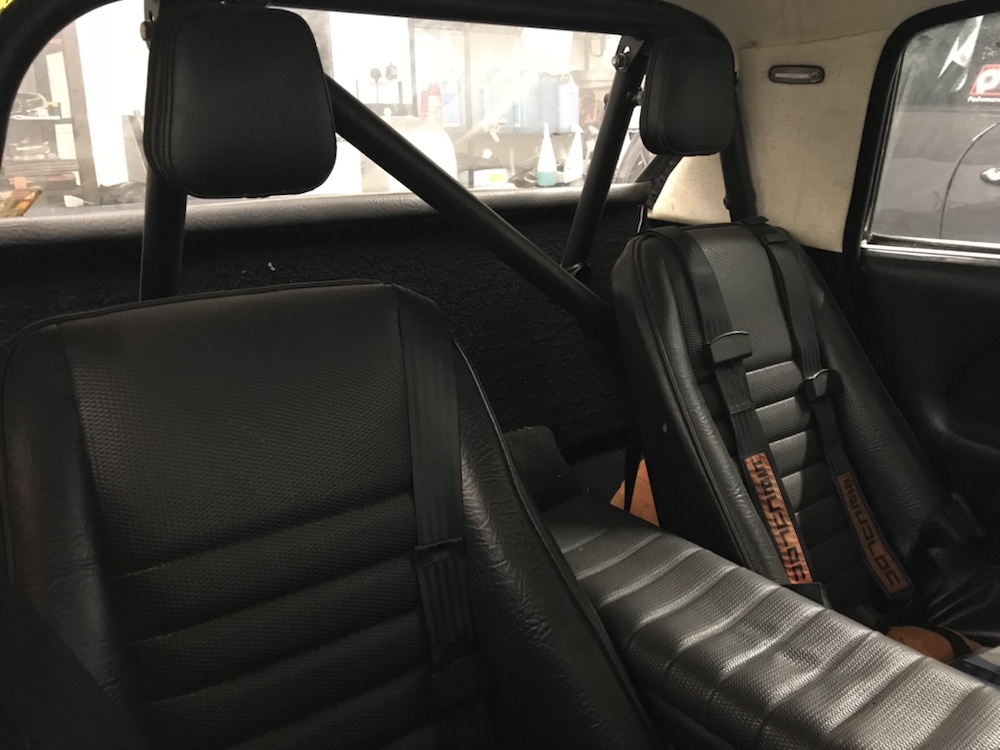
Started out removing the seats, as they’re on the big old list of things to take out to lighten the body before lifting off.

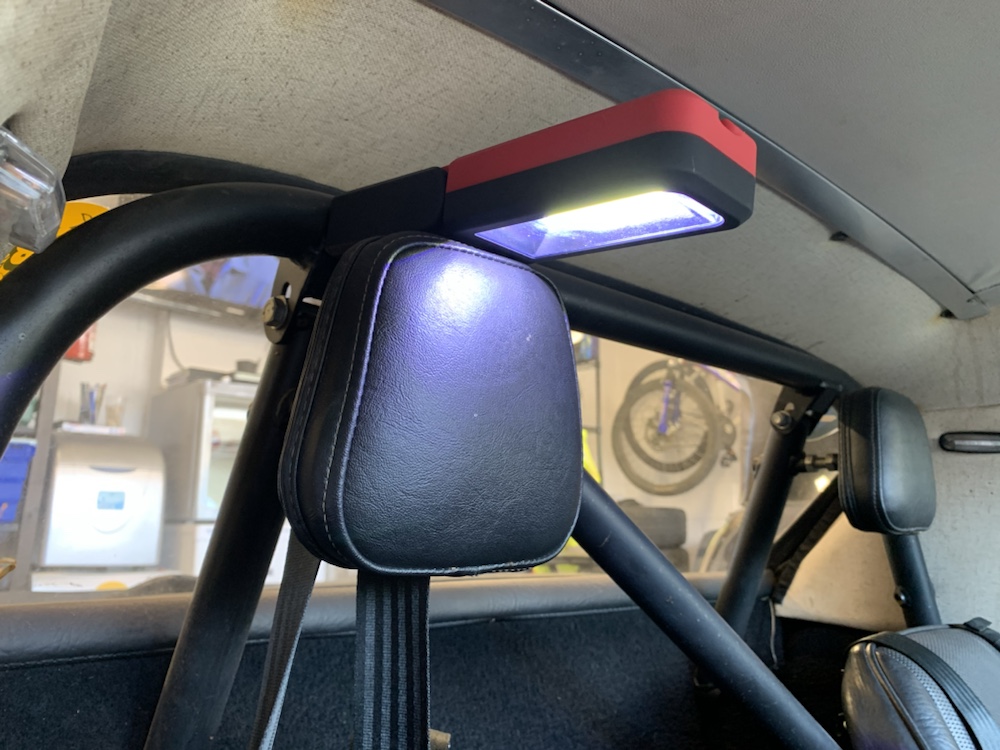
Incidental hot tip, roll cages make excellent hand light mounts.

Not a great start, and for someone who believes in omens, actually, rather troubling!

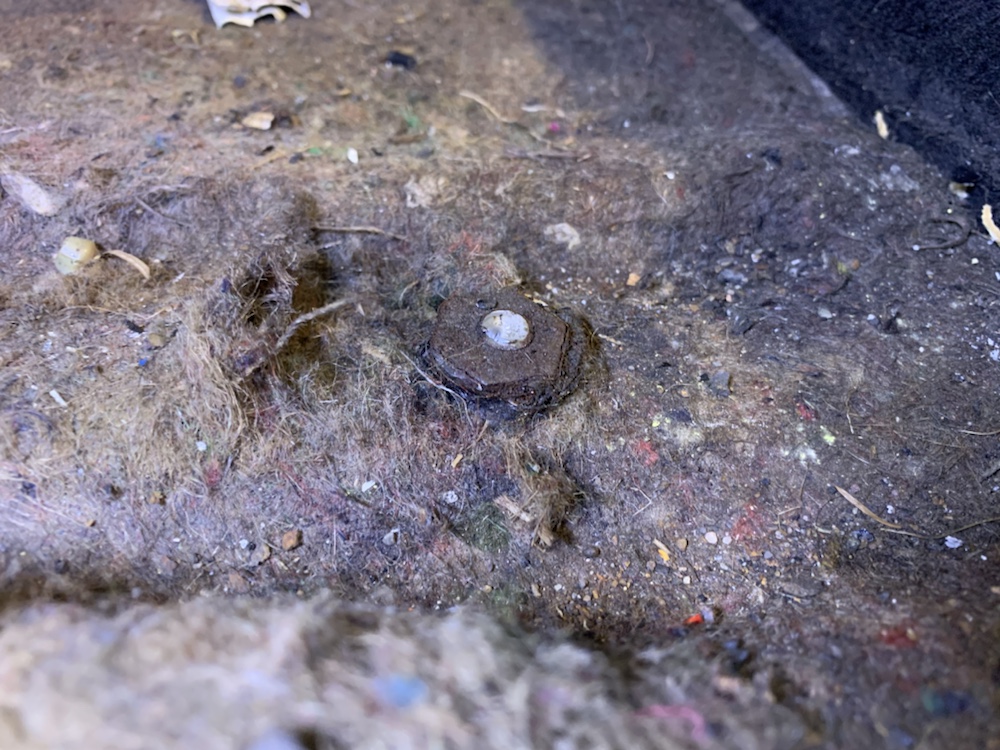
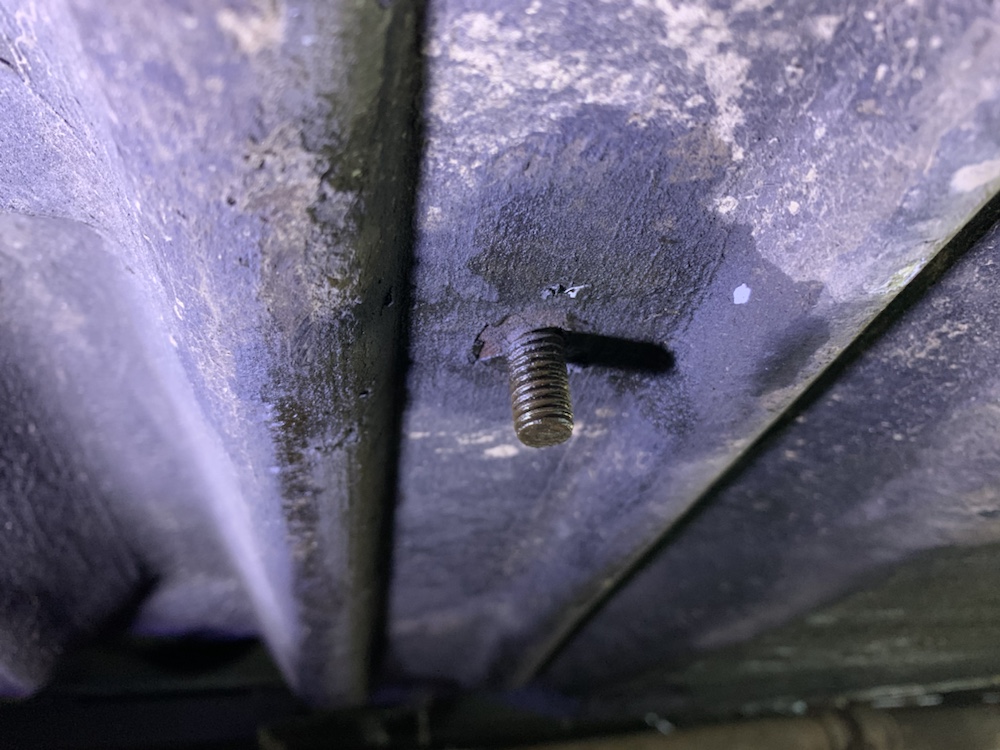
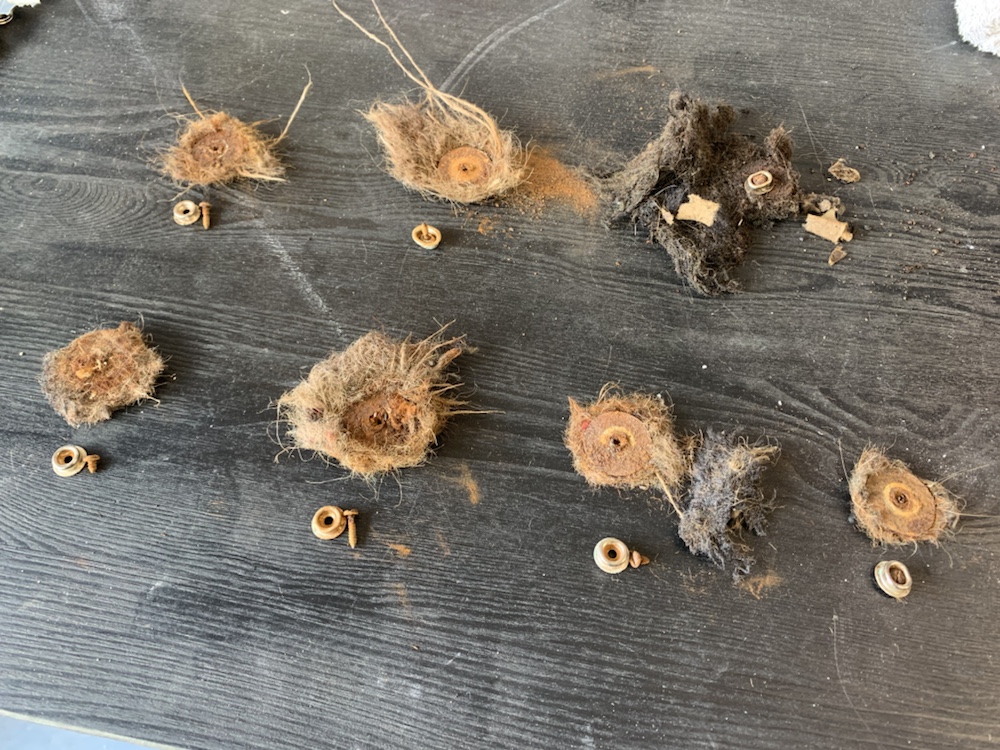
Thankfully only one of the bolts holding the driver’s seat in sheared, the other and both passenger seat ones came free.

Not an uncommon issue with the bolts corroding and binding in to the bobbins. It is, however, a particular pain in the backside when you can’t use heat to try and free them up. The bobbins are bonded in to the fibreglass shell and heating them to any meaningful extent would cause damage.

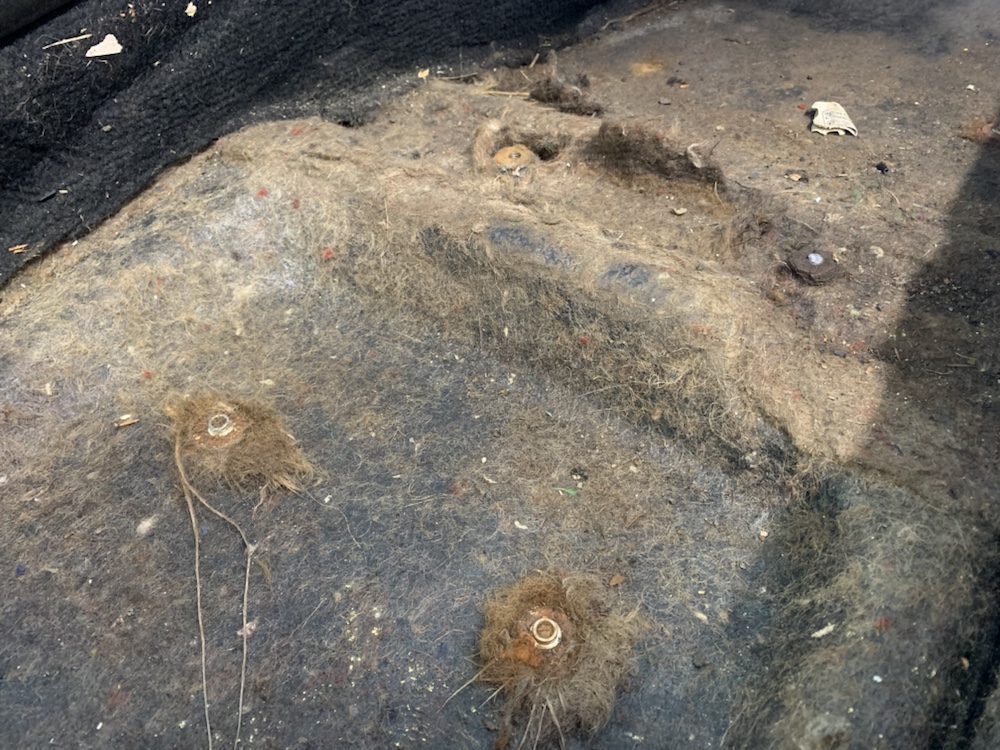
Seats out, the main floor carpets pop right out, literally. There’s only poppers holding them down, in this case, the remains of poppers holding the remains of carpet down.

Top quality British build quality. Absolutely no consistency of screws used, some only a few millimetres, others long enough to poke right through the floor (although that only needs about ~8mm to be fair).

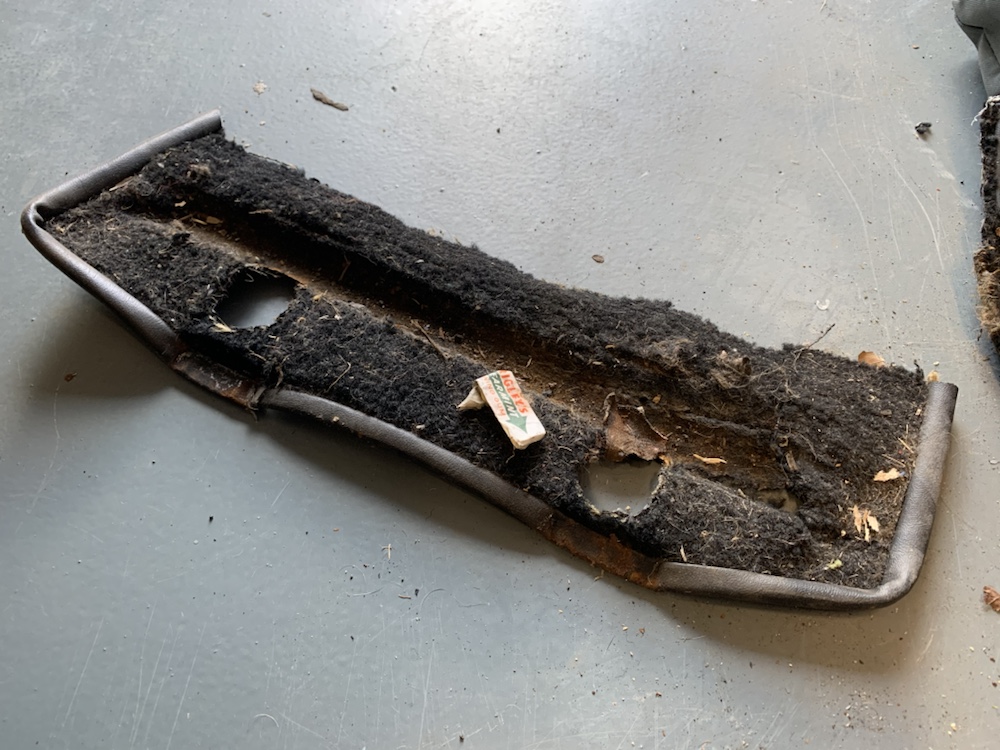
The remains of the carpet and underlay, plenty of the underlay remaining stuck to the floor. Good few hours wasted with a steam cleaner trying to scrape it out!

Next up, I wanted to get a look under the car and see how things were holding up. The jacking points on the Elan are actually not dissimilar to a normal steel monocoque car.

But… I just wasn’t that keen on using them. Whilst I have no reason to think our sills are worse for wear, it can be an issue with the steel reinforcement inside corroding. So I decided not to take the chance and to go with option B (Blue Peter).

Using an off cut and a half inch sheet of polystyrene, I made a jacking pad for under the vacuum tube. This is a well known alternative jacking point and plenty strong, as that’s where the towing eye is located, but it makes sense to spread the load as much as possible.

Obviously not going under the car without it being supported on axle stands, but was still able to get a decent look from the front and sides.

The chassis itself is in good condition, only light corrosion evident, as would be expected. Although I know it’s been upgraded to a Spyder item, I don’t know how old said chassis is.

Front suspension arms are in decent condition, again, not standard items. The flakey chromed finish is on tube steel, which is not what the Elan came with, the original Lotus items were formed from welded steel plate. These appear to be upgraded Spyder items.

The front dampers are Avo coilovers, can’t remember the year, but I’m relatively certain my father commissioned these in the mid 90s along with replacement damping adjustable inserts on the rear.

Evidence further back along the car of a leak coming from the crank seal, light haze of oil over the chassis brace and leading up to the bell-housing. More about that very open bell-housing at a later date.

Timeline wise, at this point we’ve reached the start of May-2020.

BMW Rear Light Fix

My car has been intermittently playing the brake / indicator failure warning game for the last 6 months, but the bulbs were actually functioning fine. Then in the last 2 weeks, the warnings become permanent and the lights had actually stopped working this time.

Fixed it this weekend. Unfortunately the easy fix, 1 pin swap out, wasn’t viable as the remains of the disintegrated pin from the bulb holder was stuck in the connector, meaning it couldn’t be released from the plastic plug body. Maybe if you catch it when the error is intermittent, you’d get away with just replacing the bulb holder and 1 pin in the plug.

Mine ended up needing the new plug body, re-used the other 3 original female pins with 1 new pin from the repair kit and the new bulb holder.

One new 4 series bulb holder (left rear)
Plug repair / replacement kit; 1 x plug body, 6 x female pins, 7 x green grommets, 4 x blue bungs
Purple plastic slider locks the pins, pushing the little triangle in with a fine screwdriver or pick should release the pins
Unless the remains of the bulb holder male pin is still stuck in the plug’s female pin, in which case it’s a whole plug replacement needed
Stripped that a bit too far, really only needs 4-5mm exposed wire, definitely not the inch or so that half the folk on YouTube seem to prefer! Gave it a slight trim before crimping
One knackered bulb holder, 3rd pin in from the left is gone. Mostly inside the female pin on the loom plug
New bulb holder with correct complement of pins

How to, if you fancy a go yourself.

https://youtu.be/jFLu_xmG90Y

So giving the car a barnfind style wash down isn’t a restoration, next came some actual tool work to start looking in to the car’s issues and check for other problems, as yet unknown.

The whole reason the car was parked up was ultimately the overheating. Having just spent a decent wedge having work done on the engine to cure an overheating issue, also a rebuild of the driver’s electric window, my father took the car for a drive on a sunny summer day, mid 2001.

When it got to being a bit longer than expected, my mother and I weren’t that surprised when an AA flatbed trundled up the street. The electric window had jammed down, after being opened to let the extra heat out, the extra heat coming from running the blowers full chat to try and add cooling to an overheating engine.

Many 4 letter words were thrown at the car, it was allowed to cool in the street, then driven in to the garage where it was left to think about just what it had done.

Hence my priority number 1, was to try and check the overall health of the engine. Pulling the radiator cap, I wasn’t entirely surprised to find it was not full to the brim. Some crystallising and residue left in it wasn’t that much of a surprise. When I removed the top hose and plugged the radiator boss and the thermostat boss with rubber gloves, I discovered there was still coolant in the system though.

For a long time I have felt the cooling system has a glaring issue on the car and in other engine bay shots I’ve found online and on local racecars I’ve managed to have a nosey round, they have taken steps to address or mitigate this. The system inherently wants an air pocket.

Slightly difficult to get a good shot of, but the radiator sits wonky and this puts the top of the tank on an angle, where the cap is lower than the top of the tank on the opposite side. The same elevated side of the tank is the one with the radiator top hose boss, which is above the thermostat elbow. This will be addressed via a header tank when being rebuilt.

Next up was checking the plugs, to get an idea how the car had been running in general. Each plug was pulled, numbered and inspected in turn.

Overall, actually not too bad, although Cylinder #3 appears to have been running richer than the others.

Last check was the oil, to check for any signs of emulsion suggested a breach in the headgasket.

Whilst obviously in need of an oil change, no signs of emulsion or water/coolant present. As a side note, how brilliant are old dipsticks?!

Danger! Needs filled. It’s full. So simple!

Perhaps it’s the geek in me, but some of the period stuff on the car I just find so cool.

Remember the days before all this 01… phone number nonsense…?

Conveniently this also shows just how gubbed the window seals are!

Inside escaped the majority of the dust, despite the electric window being jammed down on the driver’s side the entire time it was parked up. It also smells fantastic, genuinely, not sarcasm. Real leather, fake leather, vinyl, fibreglass, wood, oil, just brilliant!

Interesting engine bay this, I don’t think it’s quite right. The radiator set up looks like the one from the Plus2 130S variant rather than an S4 but I can’t be sure. An awful lot of Elan engine bay shots have uprated or altered cooling systems, with good reason, it was an overheating incident which saw ours parked up in the bad books.

It is a Stromberg carburettor equipped car, which means it’s not got as much power potential as it’s Weber clad brethren, but by all accounts, it’s the more streetable engine and that’s ultimately what the car will used for. Despite the (half)cage, there aren’t any motorsport aspirations for her.